

Destination: How to Start
The Destinations page lets you enable delivery providers, link them to your sources, and manage each destination’s settings and shipments.
What is a Destination?
In Muvx, a Destination represents a delivery provider (such as Beep Beep, Quick Delivery co, Seeda or even the Autobot simulator) where your shipments are dispatched. Once connected, you can link your sources to a destination and start routing orders.
Destinations Page Overview
On the Destinations page, you can enable new delivery providers, manage existing ones, and open detail pages for configuration and shipment tracking.
There are two possible states for this page:
1. When No Destinations Are Enabled
If you haven’t added any delivery partners yet, the page will show a clear call-to-action:
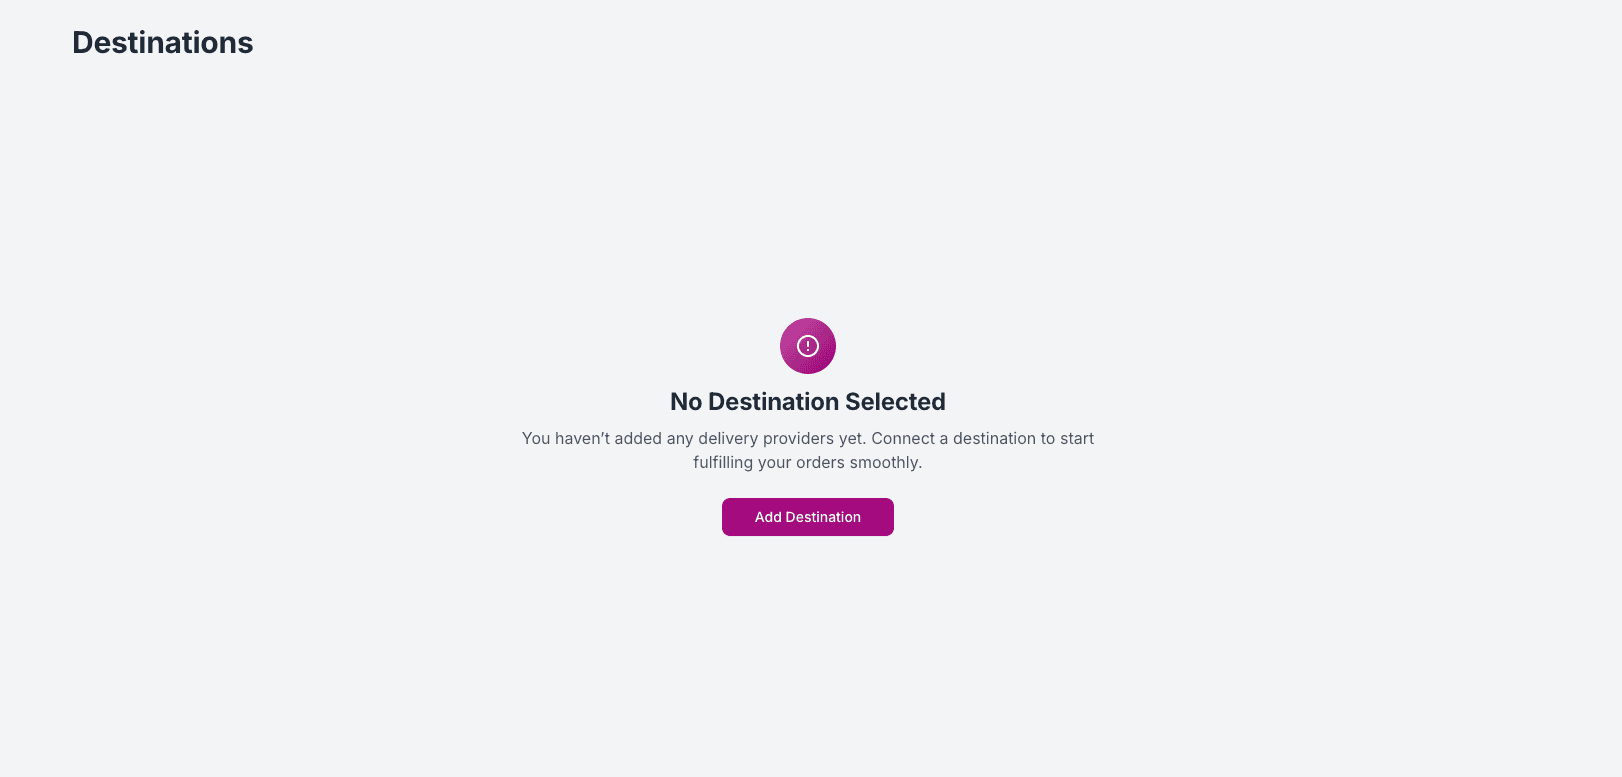
Click "Add Destination" to browse the available delivery partners and choose one to get started.
2. When Destinations Are Enabled
Once you’ve added destinations, the list displays all enabled providers .
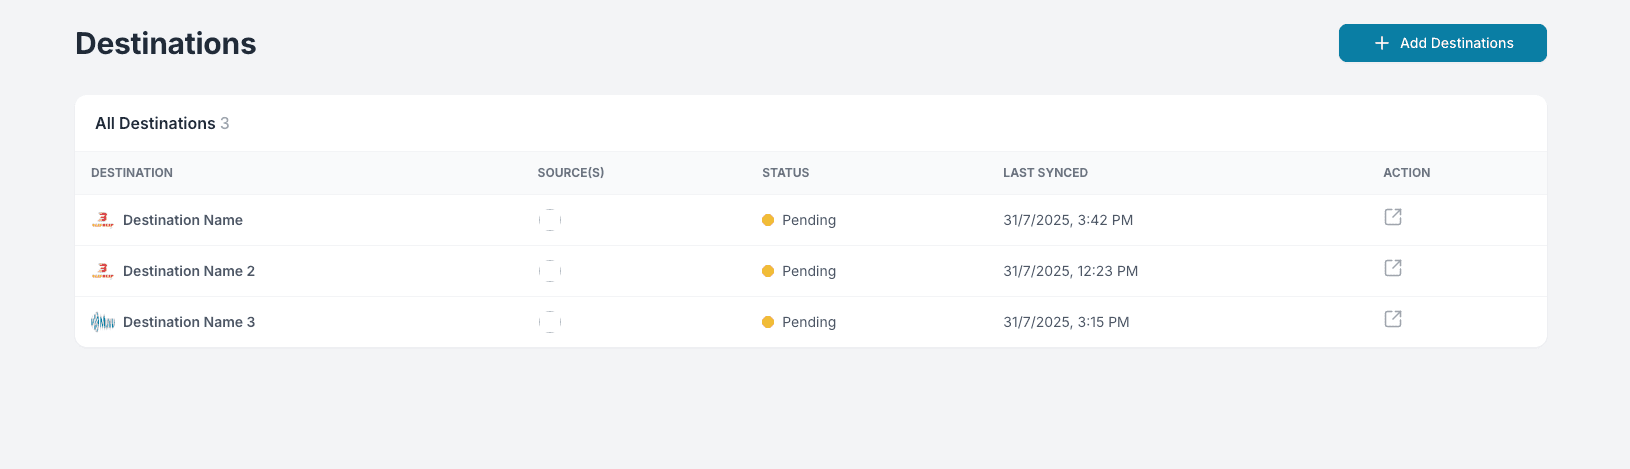
You can add more destinations anytime by clicking the “Add Destinations” button.
Add a Destination
Adding a new delivery partner to your Muvx account is quick and straightforward.
Step 1: Choose a Delivery Partner
Select from the catalog of available delivery providers
Muvx acts solely as an integration platform and does not manage or negotiate delivery contracts, pricing, or service terms on your behalf. Before enabling any delivery provider, make sure your business has an active, pre-established agreement directly with that provider. Only select providers you are already contracted with.

Each provider card includes a short description and an “Add Destination” button.
You can start with Autobot to test the full delivery flow without connecting a real courier service.
About Autobot
Autobot is Muvx’s built-in test destination, ideal for simulating the full delivery lifecycle without needing a connection to a real courier service.
When you send a test order to Autobot, it will automatically progress through each delivery status—Created, Accepted, Dispatched, Picked Up, In Transit, and Delivered—one step every 60 seconds.
This makes it perfect for testing webhook flows, validating your integration, and debugging how your system handles status updates.
Use Autobot as a sandbox delivery provider to simulate the full shipment lifecycle. After sending an order to Autobot, its status will automatically update every 1 minute, helping you test how your system handles real-time delivery events.
Step 2: Integration Setup
After selecting a delivery partner, you’ll be asked to configure the destination:
- Destination Name — a label to identify this delivery instance internally.
- Select Sources — choose one or more sources to connect to this destination.

Some delivery providers may ask for additional fields during setup, such as access tokens, service region, account credentials, or integration keys. These fields will appear dynamically based on the provider you select.
Click “Complete Integration” to save the destination and start routing shipments.
After saving, the new destination will appear in your Destinations list, ready to be linked to one or more Sources.