

Connections
The Connections section lets delivery providers manage their relationships with other businesses on Muvx.
Enterprise Merchant
The Enterprise Merchant section allows delivery providers to manage and track all enterprise-level merchants connected to their company.
Merchant List
The main list shows all enterprise merchants linked to your company.
Each row in the table includes:
- Company Name – The merchant company name.
- Status – Connection status (e.g., Pending / Enabled / Disabled / Rejected).
- Number of Connections – A company may create multiple destinations and connect from different sources.
- Total Shipments – Total shipments processed with this merchant.
- Action – Opens the Enterprise Merchant Detail page.
Merchant Detail
The detail view is accessible from Merchant (List → Action: Open)
and contains four tabs:
A) Overview
The Overview tab gives a quick summary of this Merchant’s performance and health.

-
KPI cards show totals for:
Created Orders,In Progress Orders,On Way Orders,Delivered Orders -
A preview of Integration Error Logs lists:
Company,Order ID,API Name,Status Code,Timestamp -
From here you can:
- Monitor overall shipment flow at a glance
- Identify recent integration errors quickly
- Navigate to the full Logs page for detailed debugging
B) Logs
The Logs section shows all API interactions related to this Merchant.
Each log entry displays:
Company, Order ID, API Name, Status Code, Timestamp, Path, IP Address, Details
C) Shipment
The Shipment tab shows all shipments associated with this Merchant.
-
Filter shipments by status:
Created,Accepted,Dispatched,Picked Up,In Transit,Delivered,Cancelled,Failed -
Each row includes:
Integration ID,Source,Shipment ID,Created Date,Status,COD (Cash on Delivery),Last Updated,Details
D) Settings
The Settings tab allows you to manage authentication and configuration for this Merchant.
Depending on the delivery provider’s system, the required credentials can vary. For example, one provider may only need an API Key, while another may require Username and Password
Add Enterprise Merchant
Use the top-right button (Add Enterprise Merchant) to open the Catalog.
The Catalog lists merchants who opted to be discoverable. From there you can select a merchant and send a connection request.
Each merchant in the Catalog can appear in one of the following states:
- Send Request – Available to select and send a new connection request.
- Accepted – Your request was previously sent and approved.
- Pending – You have sent a request but it is still awaiting the merchant’s approval.
- Rejected – Your request was sent but declined by the merchant.

After you submit a request:
- The merchant immediately appears in your Enterprise Merchant list with Status = Pending.
- The connection remains inactive (Disabled) until the merchant approves your request.
- Once approved, the status changes to Enabled and the connection becomes active.
- If the merchant rejects the request, the status becomes Rejected and remains visible in the same list.
• All negotiations happen outside of Muvx. Sending a request does not imply a signed agreement.
• Pricing, service terms, and any legal agreements must be finalized directly between you and the merchant.
• A connection request must be approved by the merchant before it becomes active.
Connection Flow
When you send a request to connect with an enterprise merchant, you must provide the required integration credentials.
These vary depending on both systems. Examples include:
- API Key (generated in your system and shared with the merchant)
- Username & Password
- Client ID & Secret

Once submitted, the system validates your inputs and creates the pending connection entry in your Enterprise Merchant list. After approval, you can manage shipments, logs, and settings for that connection.
Individual Merchant
Individual Merchants are small or independent businesses that do not have their own website or system to integrate with Muvx.
Instead of using APIs, delivery providers can create and manage these merchants directly in the panel. Once created, the User receives access to a simplified Muvx Merchant Panel via emai, where they can manually register and submit their orders.
Merchant List
The list shows all Individual Merchants created under your company.
Each row includes:
- Name – Merchant’s full name
- Brand Name – Optional store/brand name
- Email – Used for panel access
- Phone Number – Merchant’s contact
- Address – Default pickup address
- Total Shipments – Shipments completed with this merchant
- Action – Opens the Individual Merchant Detail page
Note: Individual Merchants are created directly by the delivery provider. There is no public catalog for discovery.
Individual Merchant Detail
Clicking Action on any Individual Merchant in the list opens the detail view.
The detail page is divided into three tabs:
1. Overview
The Overview tab provides a quick snapshot of the merchant’s account and performance.

-
KPI cards show totals for:
Created Orders, Accepted Orders, Picked-up Orders, Delivered Orders -
A Share Merchant Panel Link is available so you can quickly copy and send the login link to the merchant.
-
The Individual Merchant Info section displays:
• Full Name
• Email
• Phone Number
• Address -
At the bottom, a list of Recent Shipments is shown, including:
Integration ID, Destination, Order ID, Created Date, Status, COD, Last Updated
2. Shipments
The Shipments tab lists all shipments created by this merchant.
-
Filter shipments by status:
All, Created, Accepted, Dispatched, Picked Up, In Transit, Delivered, Cancelled, Failed -
Each row includes:
Integration ID, Destination, Shipment ID, Created Date, Status, COD, Last Updated, Action (open details)
This view lets you monitor all shipments for the merchant and track their current state in the delivery process.
3. Settings
The Settings tab allows you to manage the merchant’s account details and configuration.
- Merchant Info: Update full name, phone number, email, and optional brand name.
- Pickup Address: Adjust the default pickup address (Area and Street auto-filled from the map, with manual entry for Block, Home/Building, and Address Line).
- Connection: Update authentication credentials (e.g., API Key).
- Pricing: Set or update the fixed delivery cost per shipment.
After making changes, click Save Changes to apply updates.
This structure allows delivery providers to both monitor merchant activity and adjust settings at any time, while the merchant continues to create and send orders via their dedicated panel.
Add Individual Merchant
Click Add Individual Merchant (top-right) to start a guided setup with five steps.
Step 1 — Merchant Information
Enter:
- Full Name
- Phone Number
- Email Address
- Brand Name (optional)

Step 2 — Integration Setup
Provide the authentication fields required by your company’s integration so Muvx can place the merchant’s manual orders into your delivery system. The entered information will be validated and connection tested here. If the details are correct, you can proceed to the next step.
The exact fields vary by provider; common examples:
- API Key (issued in your system)
- Username & Password
- Client ID & Secret

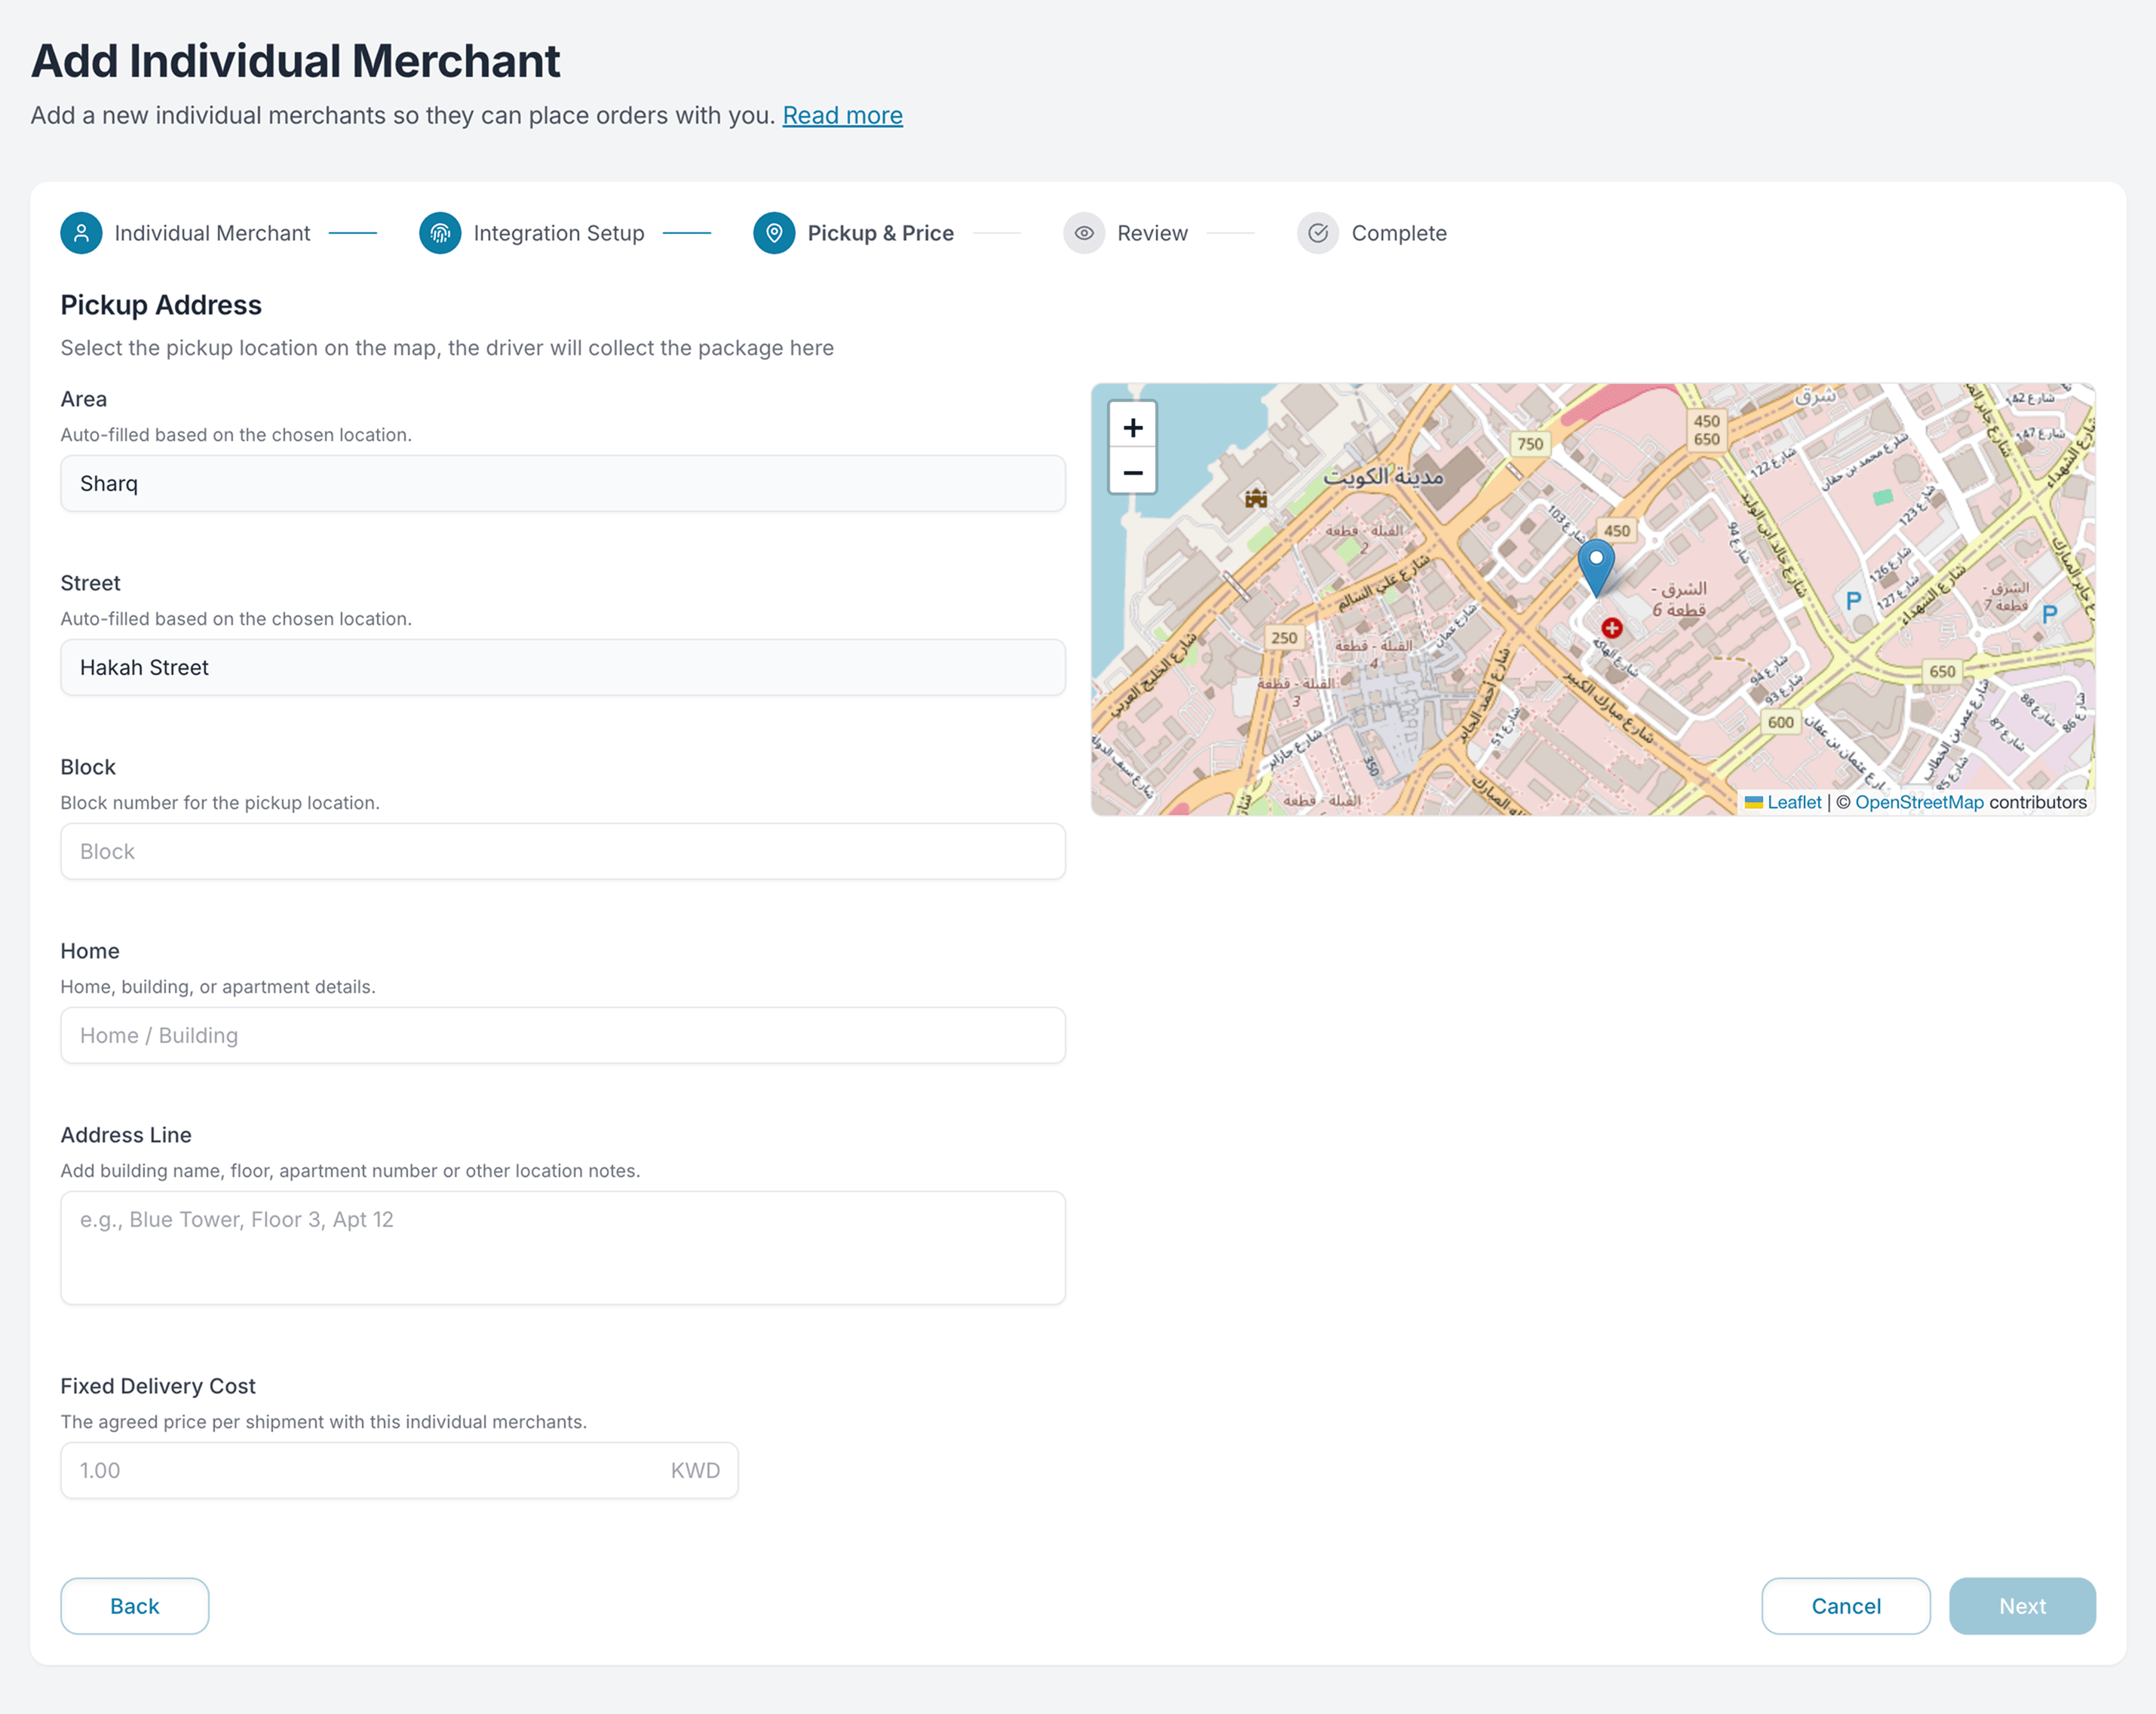
Step 3 — Pickup & Price
Define the default pickup details and per-shipment price:
- Pickup Address: Select the location on the map.
• Area and Street auto-fill from the selected pin and are not editable.
• Enter Block, Home/Building, and Address Line. - Fixed Delivery Cost: The flat price you charge this merchant per shipment.
The merchant cannot edit the address after submission. Please double-check and ensure you enter the correct address before saving.
Step 4 — Review
Verify:
- Merchant details
- Integration credentials
- Pickup address and coordinates
- Fixed delivery cost
If everything looks correct, confirm.
Step 5 — Complete
After confirmation:
- The merchant is created under your company.
- A welcome email is automatically sent to the address from Step 1 with panel access details.
- The merchant can now log in to the Muvx Merchant Panel and manually create orders, which will be routed via your delivery integration.